
Adding a Start Page | Episerver for beginners
 By - Ravindra Rathore
Hi Guys,
To create first page type in your EmptySite solution that is created in my last blog post. Please follow the below steps-
- Open the EmptySite solution in visual studio.
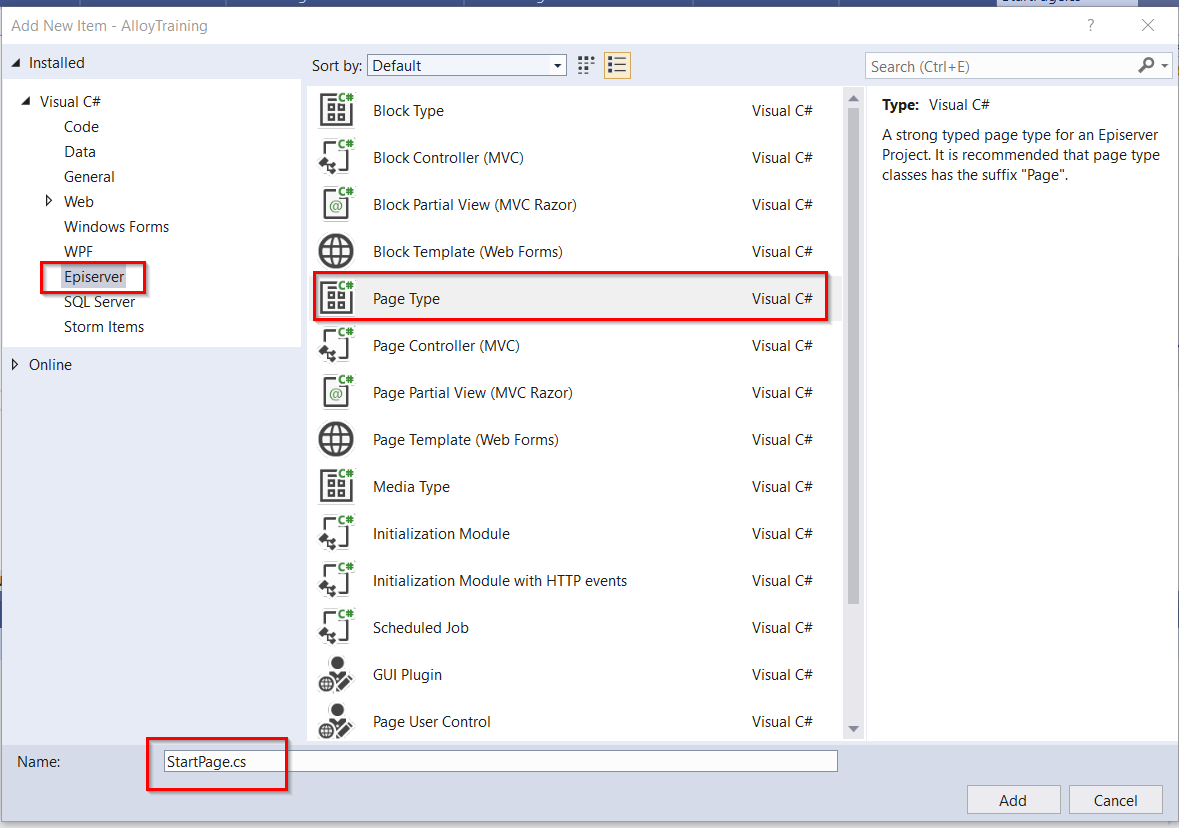
- Right click on the pages folder inside Models->Pages. Please refer below screenshot for reference.

- Now click Add-> New Item.
- Now select “Episerver” template from installed template.
- Then choose the “PageType” and give the name “StartPage”. Please refer below screenshot for reference.
using EPiServer.Core;
using EPiServer.DataAbstraction;
using EPiServer.DataAnnotations;
using System.ComponentModel.DataAnnotations;

namespace EmptySite.Models.Pages
{
    [ContentType(DisplayName = "Start",
        GUID = "4cc06328-5403-4c7d-86a5-b6f9d00c66c3",
        GroupName = SiteGroupNames.Specialized, Order = 10,
        Description = "The home page for a website with an area for blocks and partial pages.")]
    public class StartPage : PageData
    {
        [CultureSpecific]
        [Display(Name = "Heading",
            Description = "If the Heading is not set, the page falls back to showing the Name.",
            GroupName = SystemTabNames.Content, Order = 10)]
        public virtual string Heading { get; set; }

        [CultureSpecific]
        [Display(Name = "Main body",
            Description = "The main body uses the XHTML-editor you can insert for example text, images, and tables.",
            GroupName = SystemTabNames.Content, Order = 20)]
        public virtual XhtmlString MainBody { get; set; }
    }
}
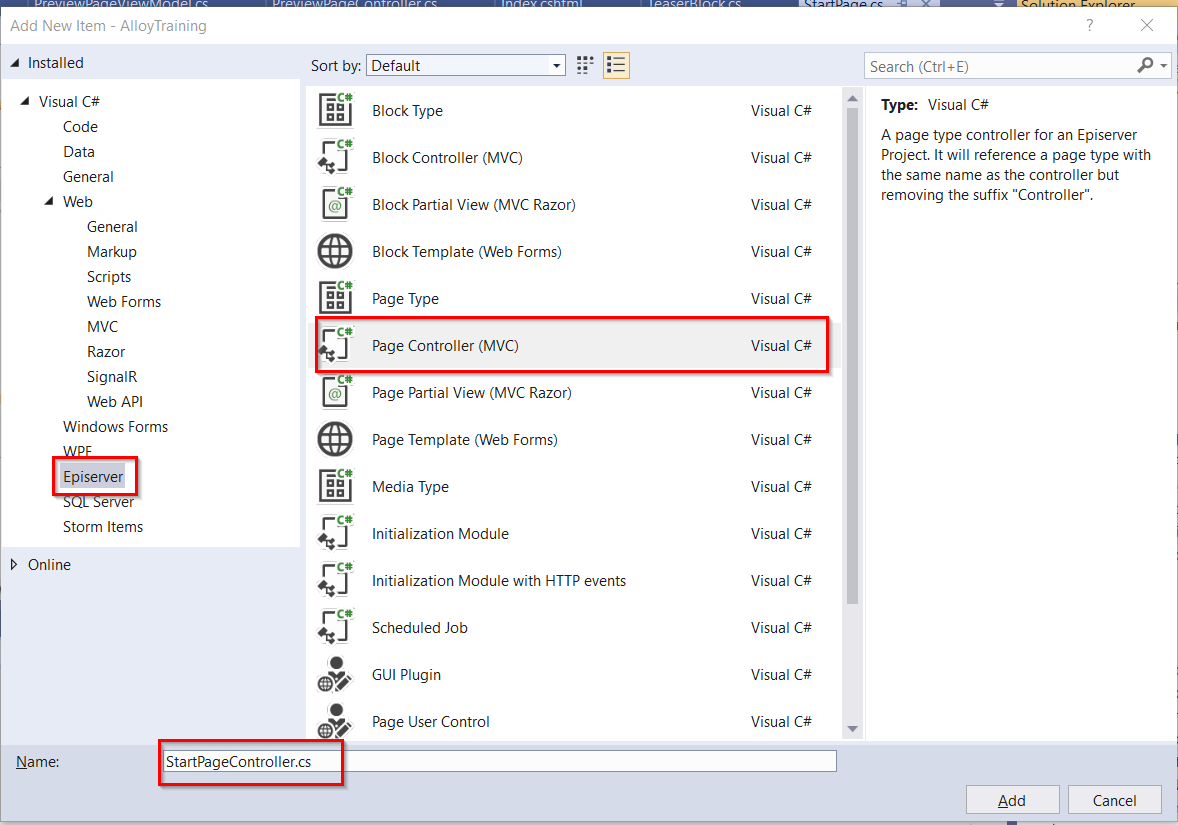
Once this is done. Now it’s time to create the controller for this StartPage.
- Right click on the “Controllers” folder .
- Now click Add-> New Item.
- Now select “Episerver” template from installed template.
- Then choose the “Page Controller (MVC)” and give the name “StartPageController“. Please refer below screenshot for reference.
Code should look like this
using AlloyTraining.Models.Pages;
using EPiServer.Web.Mvc;
using System.Web.Mvc;

namespace EmptySite.Controllers
{
    public class StartPageController : PageController
    {
        public ActionResult Index(StartPage currentPage)
        {
            return View(currentPage);
        }
    }
}
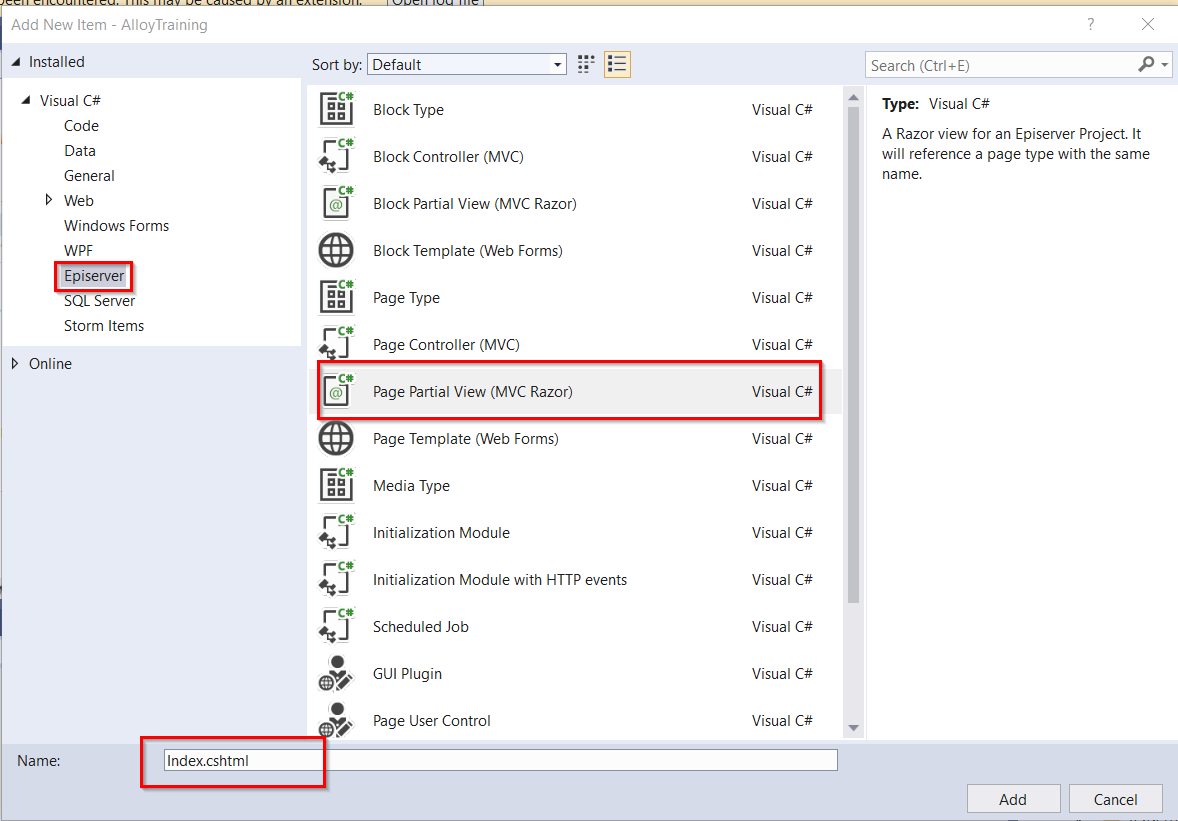
Once you are done with the StartPageController. Now it time to render the start page properties and do this just create a view for this inside the views folder.
- Right click on the “Views” folder and then choose Add->New Folder and Name it StartPage.
- Now select this new folder and right click on this and choose Add-> New Item.
- Now select “Episerver” template from installed template.
- Then choose the “Page Partial View (MVC Razor)” and give the name “Index“. Please refer below screenshot for reference
Once this is done. Update the model to use correct page type.
@model EmptySite.Models.Pages.StartPage
The index.cshtml look like this.
@using EPiServer.Web.Mvc.Html
@model EmptySite.Models.Pages.StartPage
<h1>
    @Html.PropertyFor(m => m.Heading)
</h1>
<div>
    @Html.PropertyFor(m => m.MainBody)
</div>
That’s all as a code point of view.
- To use this StartPage in Episerver CMS. Run the site using “”Ctrl+F5”.
- Login in Episerver CMS. Like ” http://localhost:56501/EPiServer/Cms“.
- To open the “Navigation Pane”. Click on the “Toggle Navigation Pane”.
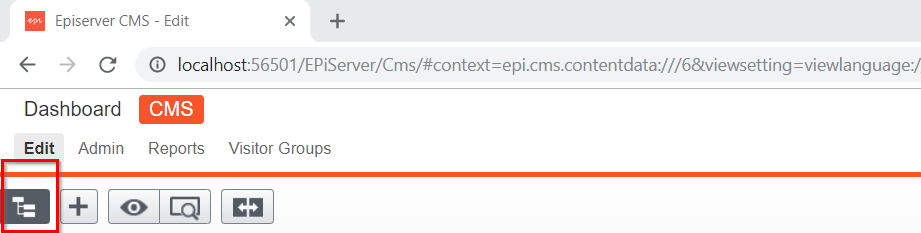
- Now create a instance of the start page by clicking the “+” icon in above screenshot or by clicking the context menu of “Root” page and select the “New Page“.
- Give it a name like “Start” and click create.
- Now fill the properties of this page and publish it. Please refer below screenshot for reference.

- To view this page. you need to set this page as a Start page.
- Click on the “Admin” near the “Edit” button in the left top section.
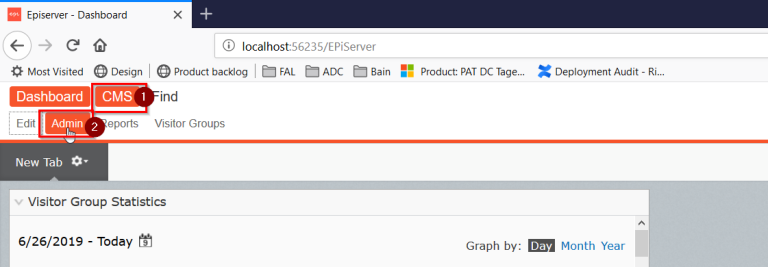
- Once the admin panel is open.
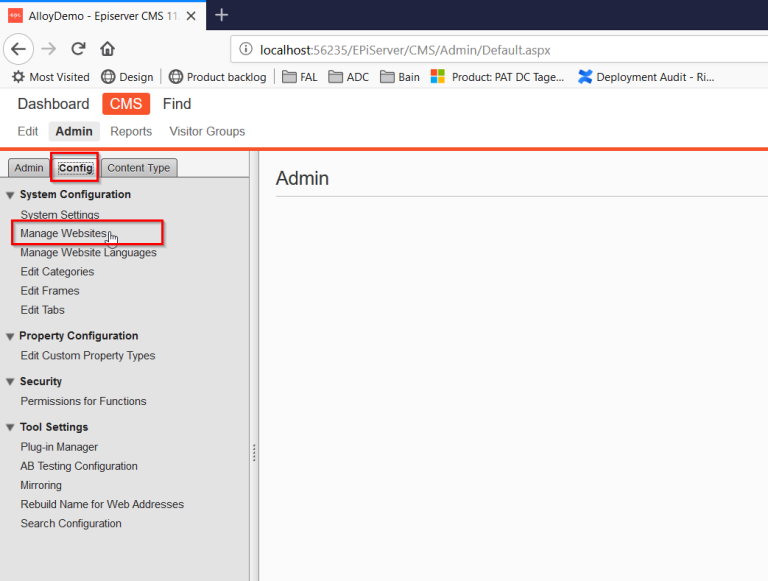
- Click on the “Config” and then click on the “Manage Websites”.
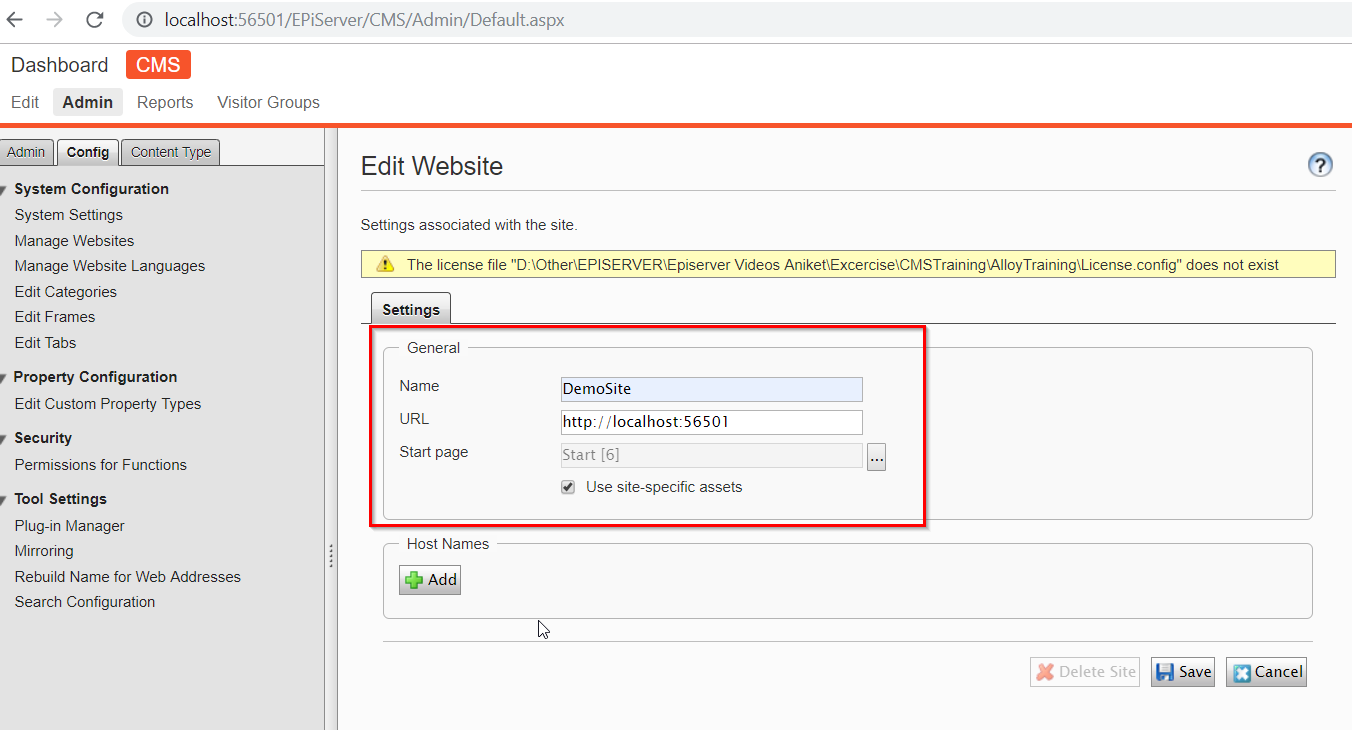
- Now click on the “Add Site” button.
- It will give the following screen.
- Please fill below properties-
- Name – Give any name like – DemoSite
- URL- Put the same URL that is showing in the browser window like – http://localhost:56501/
- Start page – It is used for selecting the start item of your website. Click on the 3 dots and select the “Start” page item.
- Use site-specific assets – It will enable a folder “For This Site” in the CMS so that content author can upload the site specific assets.
That’s all. Run the site using the URL – http://localhost:56501/
Thanks for reading this blog post I hope it helps
Thanks and regards
Ravindra S. Rathore