
Creating your first solution | Episerver for beginners
 By - Ravindra Rathore
Hi Guys,
If you are new to Episerver and wanted to start your career in the Episerver then you can refer my blog series to learn some basic thing of Episerver.
Please refer my first blog post if you already not referred this configure-your-development-environment-episerver-for-beginners
Once you are done with your configuration then move forward with this blog post.
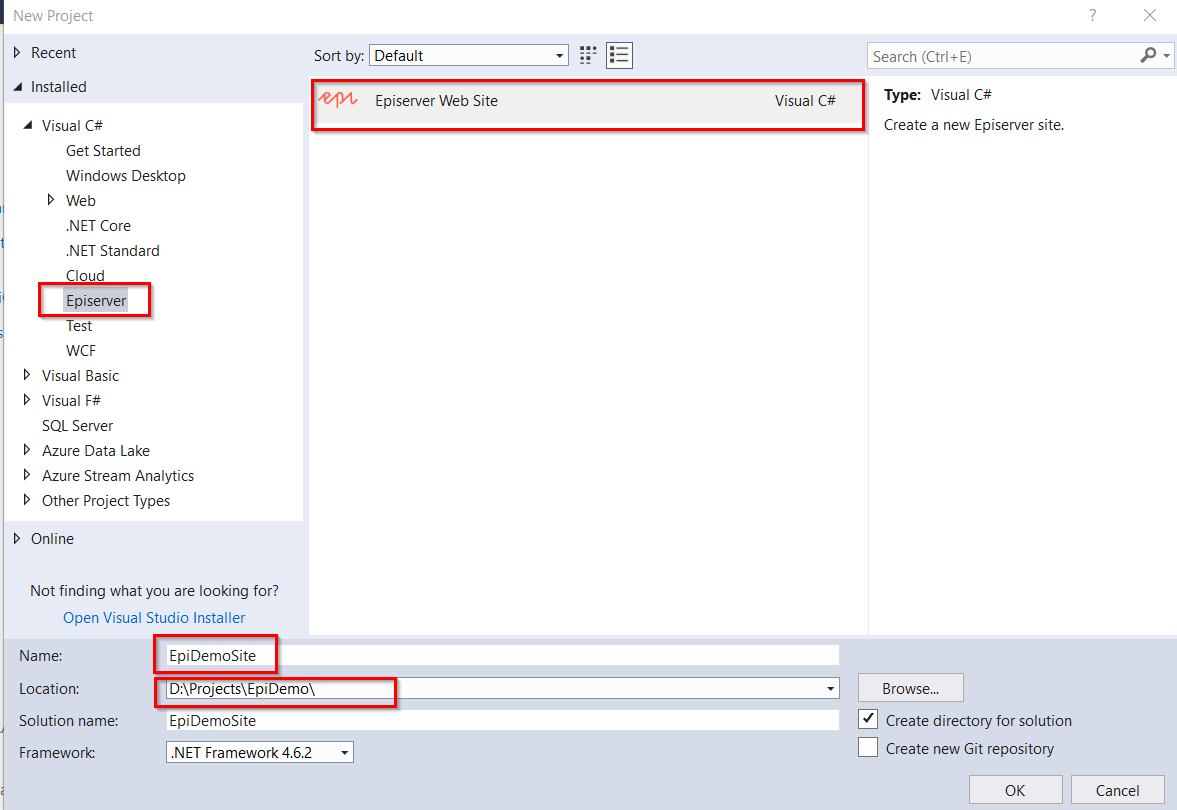
- Open your visual studio and then go to File-> New -> Project.
- Select the Episerver template from the installed template in the left section.
- Give it some name, select the location of project and press Ok button.
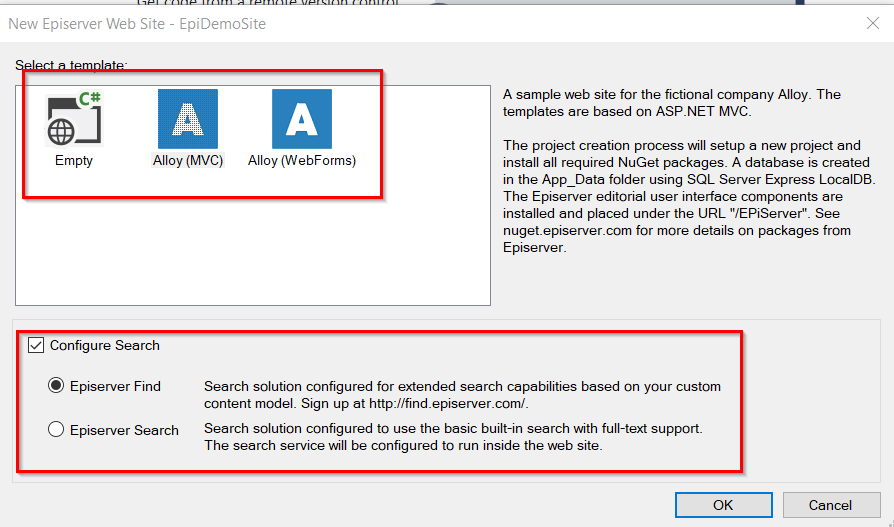
Once you are done with this. Next screen will give you the option to choose of solution type. These are the default solution types that you can use to create a new site in Episerver.
- Empty – It’s empty site with all the packages required for Episerver solution
- Alloy(MVC) – It’s a sample site that will give you a running site with all the Episerver functionality implemented. As the name suggests it will create a site in MVC.
- Alloy(WebForms) – Same as the second point but it is in old WebForms
There are two search provider options are available for the Alloy site so you can select which search you want to implement in your solution.
- Episerver Find – Find is a Episerver custom content model
- Episerver Search – Its a Lucene based solution
I personally recommend Episerver Find because it is fully supported in Episerver DXC environment.
Please create two sites-
- One with the Empty and
- One with the Alloy(MVC)/Alloy(WebForms)
Once you select the site and click Ok. It will start creating the site and you can run the sites once it created completely.
Once your site is created you can run these site using the “F5” or “Ctrl+F5” key.
- F5 – It will run the site in the debug mode
- Ctrl+F5 – It will run the site in normal mode
If you created an “Empty” site then it will give you an error because the start page configuration are not applied so to view the Episerver CMS you need to type “/episerver” after the URL in a browser. Like-
http://localhost:58617/episerver
It will ask you for the credentials. Please make sure you will login with your windows credentials and it must be an admin account. If you don’t have any local machine admin account then please create an account and make it admin. Use this account for the login and you will see the Episerver CMS
If you created a Alloy site then on the first run it will ask you to create a login account so create a login account and make sure noted down the credentials somewhere to that can use them for further login because once you created the account it will not ask you to create the credentials again. Until unless you put some registration code in your solution.
It is all about creating your first solution.
Please play with these solutions and go through with Alloy site so that you can have basic understanding of what is Episerver solution and how it is built.
Thanks for reading this.
Thanks and regards
Ravindra S. Rathore