
Getting Started | Episerver for beginners
 By - Ravindra Rathore
Hi Guys,
I am writing a blog series on Episerver cms development for beginner. So here is my first blog post about the basic configuration/software required for Episerver development.
These are the two things that we need to start the development in Episerver-
- Microsoft Visual Studio 2015 or 2017 (with latest updates)
- Episerver CMS Visual Studio Extension.
Once you installed the visual studio you need configure two things to start the development. Please follow below setups to do this.
Installing the Episerver CMS Visual Studio Extension
- Start Microsoft Visual Studio 2015/2017.
- Navigate to Tools | Extensions and Updates and click online in the left hand side.
- Press Ctrl + E, or click in the Search box, and then enter Episerver.
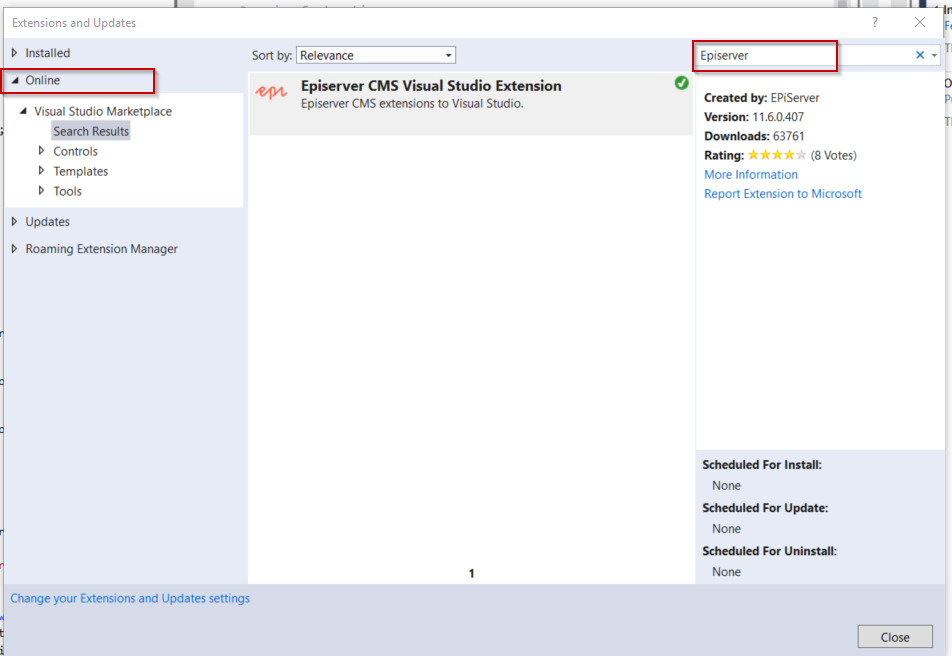
- Select the Episerver CMS Visual Studio Extension, click Download.
- Wait for the extension to download, and then click Close.
- Close Visual Studio and wait for the VSIX Installer to start.
- Click Modify, wait for it to complete installing, and then click Close.
Configuring the Episerver NuGets package source
- Start Microsoft Visual Studio.
- Navigate to Tools | NuGet Package Manager | Package Manager Settings.
- In the Options dialog, in the list on the left, click Package Sources.
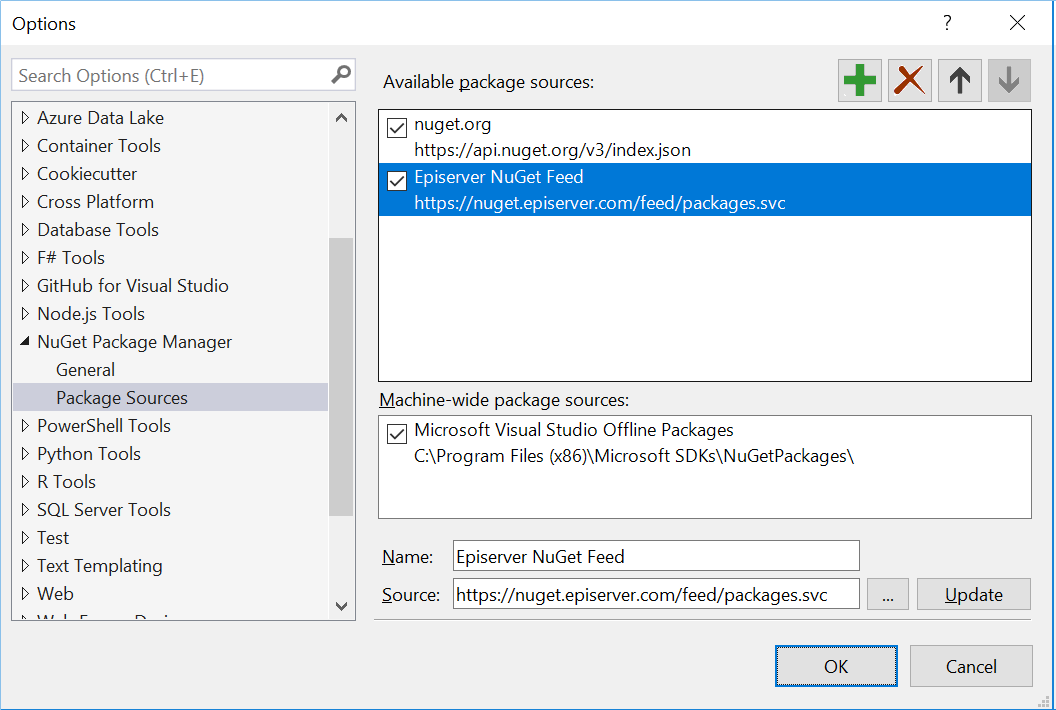
If the Episerver NuGet feed doesn’t exist as an available package source, as shown in the above screenshot, then click the green plus button to add it. The name can be anything, although we recommend using Episerver NuGets, and the path must be:
https://nuget.episerver.com/feed/packages.svc/
This all about the configuration that is required for Episerver development. You will see how to create a start page in Episerver in next blog post
Thanks for reading this blog post I hope it helps
Thanks and regards
Ravindra S. Rathore